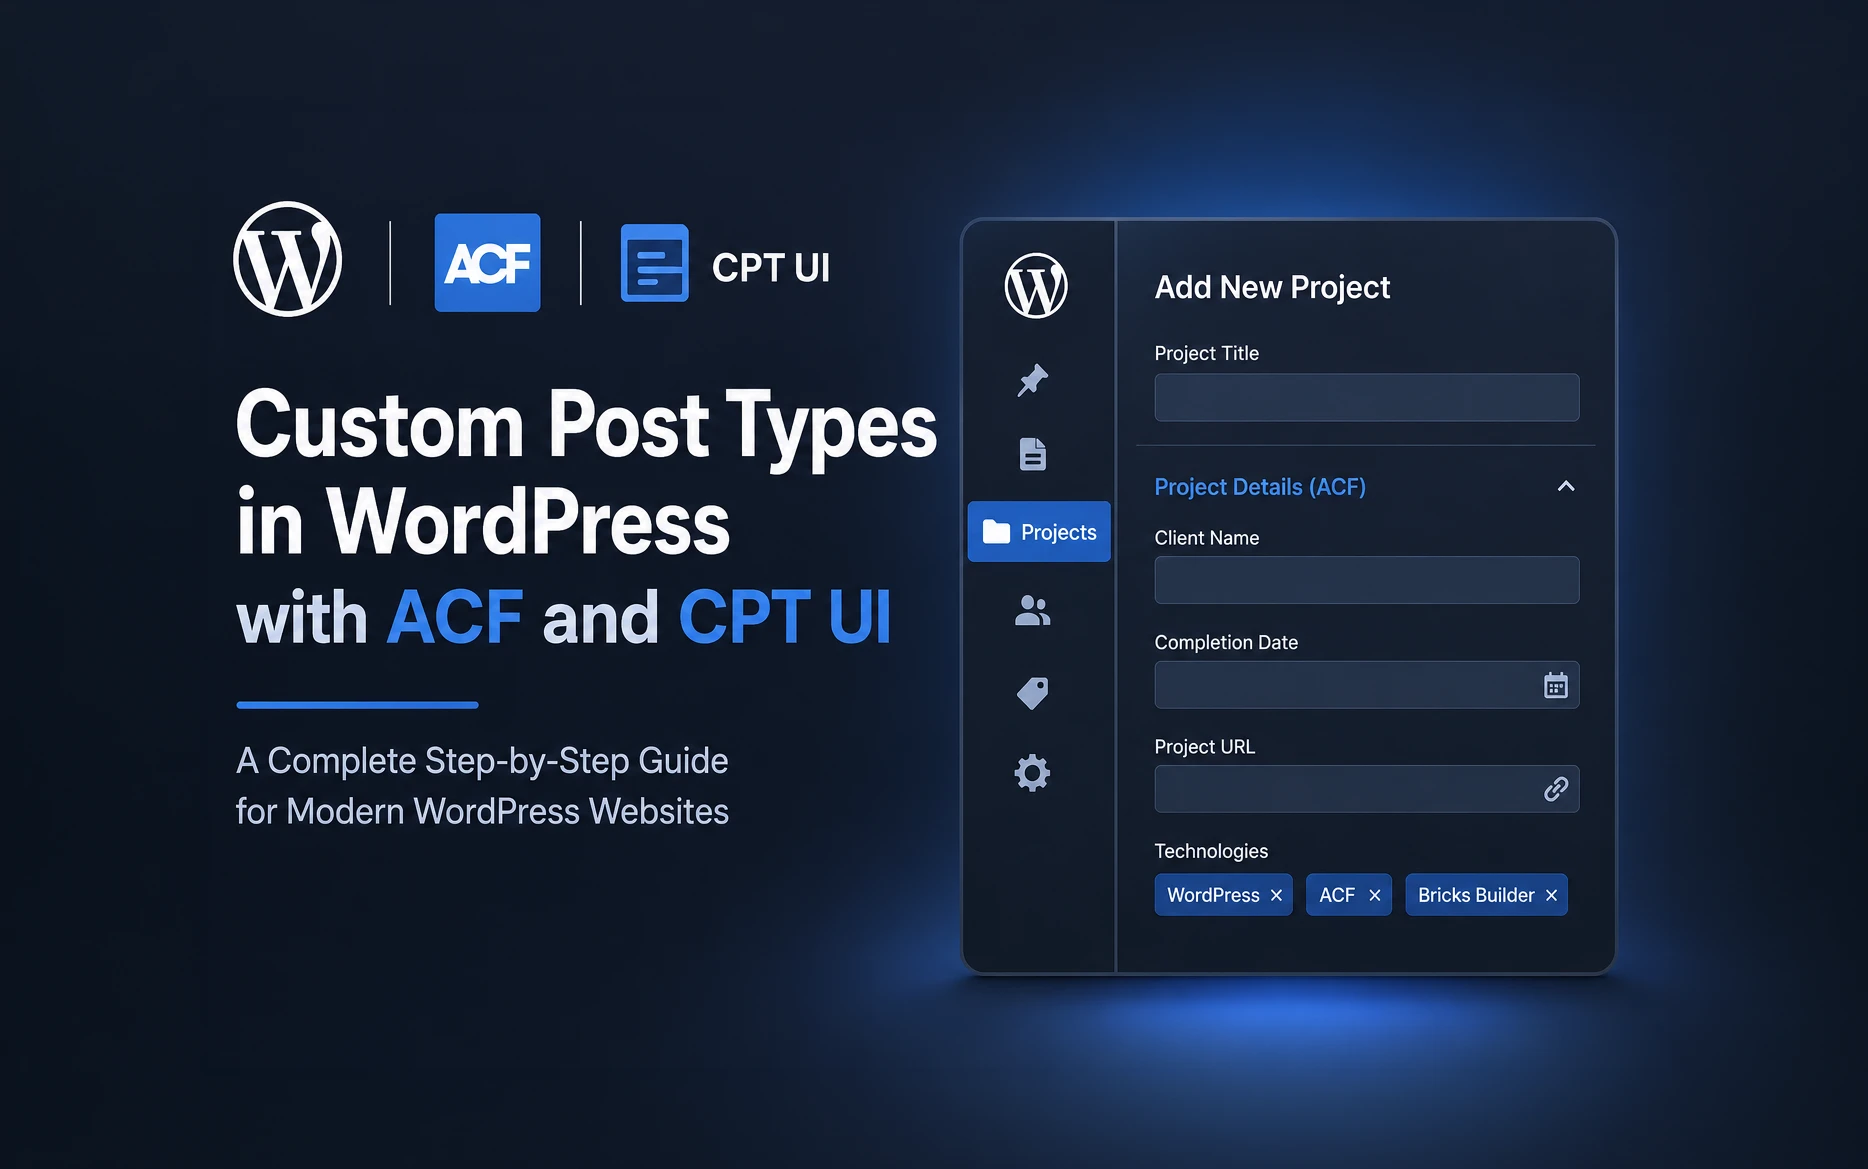
Custom Post Types with ACF have completely changed the way WordPress developers build structured websites. Instead of forcing every piece of content into Posts or Pages, you can create dedicated content types with their own custom information, making both development and content management much easier.
Whether you’re building a portfolio, company website, directory, real estate platform, or an event management system, you’ll eventually reach a point where standard posts are no longer enough. That’s where Custom Post Types and Advanced Custom Fields become an incredibly powerful combination.
For years, my workflow was straightforward. Whenever I needed a Custom Post Type, I created it using the Custom Post Type UI (CPT UI) plugin and then added all the required fields using Advanced Custom Fields (ACF). This became the standard workflow for many WordPress developers because each plugin focused on a specific task and did it well.
Everything changed in April 2023 when ACF 6.1 introduced native Custom Post Type and Taxonomy registration. Instead of using two separate plugins, ACF could now handle both the content structure and the custom fields from the same interface.
That doesn’t mean CPT UI suddenly became obsolete. Plenty of production websites still use it, and for good reason. If an existing website is already working well, there’s usually no benefit in migrating everything just because ACF now offers the same functionality.
In this article, I’ll show you both approaches. We’ll first look at the traditional CPT UI workflow because you’ll almost certainly encounter it when maintaining older websites. Then we’ll build the same structure using ACF’s newer Post Type feature and compare both approaches so you can decide which one fits your next project.
Why Use Custom Post Types?
One mistake I often see is trying to build an entire website using only Posts and Pages.
While WordPress certainly allows that, it quickly becomes difficult to manage once the website starts growing.
Imagine a company website containing:
- Blog Articles
- Projects
- Team Members
- Testimonials
- Events
- Case Studies
- Job Openings
Technically, every one of these could be created as a normal WordPress post.
But should they?
Probably not.
Each content type contains completely different information.
A Project could contain:
- Client Name
- Completion Date
- Technologies Used
- Project Gallery
- Project URL
A Team Member could contain:
- Job Title
- Department
- Email Address
- Phone Number
- LinkedIn Profile
An Event could contain:
- Event Date
- Venue
- Registration Link
- Speaker Details
- Event Banner
Trying to store all this information inside the standard WordPress editor soon becomes messy. Every editor starts formatting content differently, information gets forgotten, and templates become harder to build.
A dedicated Custom Post Type solves this problem by separating each kind of content into its own section of the WordPress dashboard.
Instead of asking a client to create a new blog post for every project, they simply click Projects → Add New.
Likewise, testimonials live under Testimonials, team profiles live under Team Members, and events live under Events.
This creates a much cleaner editing experience for clients and makes template development far more predictable.
One advantage that’s often overlooked is future scalability.
Suppose your client later asks for a page that displays only featured projects completed during the last two years. If you’ve built the website using structured Custom Post Types and custom fields, creating that page becomes relatively straightforward. If everything is stored inside standard blog posts, extracting that information becomes much more difficult.
Structured content today saves countless hours tomorrow.
Custom Post Types vs Custom Fields
One of the biggest misconceptions among developers new to ACF is assuming that Custom Post Types and Custom Fields do the same thing.
They don’t.
They solve two completely different problems.
Think of it this way.
A Custom Post Type creates a new section inside WordPress.
A Custom Field stores additional information inside each item of that section.
Here’s a simple comparison.
| Feature | Purpose |
|---|---|
| Custom Post Type | Creates a new type of content such as Projects or Team Members |
| Custom Fields | Store additional structured information for each item |
| Taxonomies | Organize and classify content |
Let’s use a Projects section as an example.
The Custom Post Type creates the Projects menu in the WordPress dashboard.
Inside that section, each individual project is simply another post belonging to that post type.
Now imagine creating a project called:
Corporate Website Redesign
The title alone isn’t enough.
You’ll probably want additional information such as:
- Client Name
- Completion Date
- Project Cost
- Technologies Used
- Live Website
- Image Gallery
- Featured Project
- Project Status
This is exactly what ACF is designed for.
Instead of asking editors to remember where to type each piece of information, ACF provides dedicated input fields for every value.
Besides making data entry easier, this structured approach also makes frontend development significantly cleaner.
Rather than searching through large blocks of text, your template can retrieve exactly the information it needs and display it wherever you want.
That’s one of the biggest reasons ACF has become a standard tool for WordPress development.
The Workflow Before ACF 6.1
If you’ve been developing WordPress websites for a while, this workflow will probably look familiar.
For years, creating structured content involved two plugins working together.
The process was usually:
- Register the Custom Post Type using CPT UI.
- Create the required field groups using ACF.
- Assign the field group to the Custom Post Type.
- Display the information in your theme, Bricks Builder, Elementor, or custom PHP template.
This approach was simple, reliable, and easy to maintain.
I used it on numerous projects.
For example, if I needed a portfolio section, I would first create a Projects Custom Post Type using CPT UI.
Once the post type existed, I’d create an ACF field group containing fields like:
- Client Name
- Project URL
- Completion Date
- Technologies Used
- Gallery
- Project Summary
Finally, I’d build the frontend template and display those fields wherever they were needed.
This separation of responsibilities actually made a lot of sense.
CPT UI handled the WordPress content structure.
ACF handled the data attached to that structure.
Although ACF now includes its own Post Type registration feature, the traditional workflow remains extremely common. Many client websites built over the past decade still rely on CPT UI, and there’s nothing wrong with that.
Personally, I don’t migrate an existing website simply because ACF has added this feature. If the website is stable and easy to maintain, I prefer leaving it as it is.
For new projects, however, my workflow has changed. Having the Custom Post Type, taxonomies, and field groups inside the same plugin keeps everything organized and reduces the number of plugins required for the project.
In the next section, we’ll create the same Projects Custom Post Type using CPT UI, explain every important setting, and then recreate it using ACF’s built-in Post Type registration introduced in version 6.1.
Creating a Custom Post Type with CPT UI
Although ACF now supports Custom Post Type registration, it’s worth understanding the traditional workflow because many existing WordPress websites still use it.
We’ll use a Projects section throughout this article.
Once you’ve created the post type, the WordPress dashboard will contain a new Projects menu where editors can add, edit, and manage projects independently of normal blog posts.
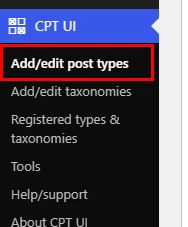
Open CPT UI → Add/Edit Post Types.
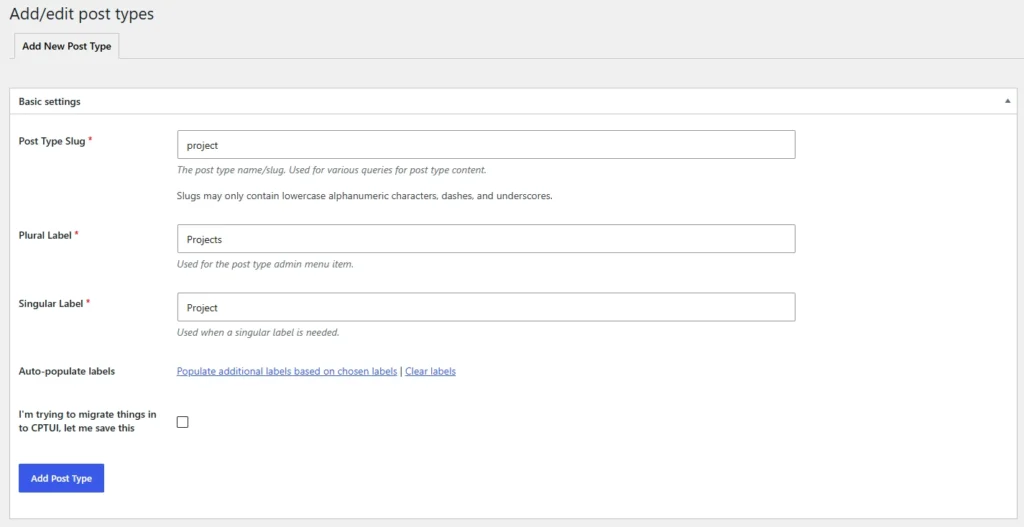
You’ll first see three required fields.
Post Type Slug
project
The slug is the internal name WordPress uses to identify the post type.
Keep it:
- Singular
- Lowercase
- No spaces
- No special characters
Although visitors will eventually see /projects/ in the URL, the actual post type key should remain singular. This matches the way WordPress internally registers post types.
Avoid changing the slug after content has already been created. Existing posts will still exist in the database, but WordPress will no longer associate them with the new post type.
Plural Label
Projects
This is the label shown in the WordPress dashboard menu.
Singular Label
Project
This appears when adding or editing an individual project.
Important Settings
CPT UI provides dozens of options. Fortunately, most projects only require a handful of them.
Public
Enable this.
A public post type can appear on the frontend, in search results, archives, and templates.
If you’re creating internal data that editors use only inside the dashboard, you can disable this. For most websites, however, Public should remain enabled.

Has Archive
Enable this if you want WordPress to generate an archive page such as:
https://example.com/projects/
This is useful for portfolios, case studies, team members, events, and testimonials.
If every project will only appear on a custom page or homepage section, you can disable archives.

Rewrite
This determines the URL structure.
For Projects, I usually use:
projects
The result becomes:
/projects/company-website/
/projects/mobile-app/
Choose your slug carefully because changing it later can affect existing URLs and SEO.

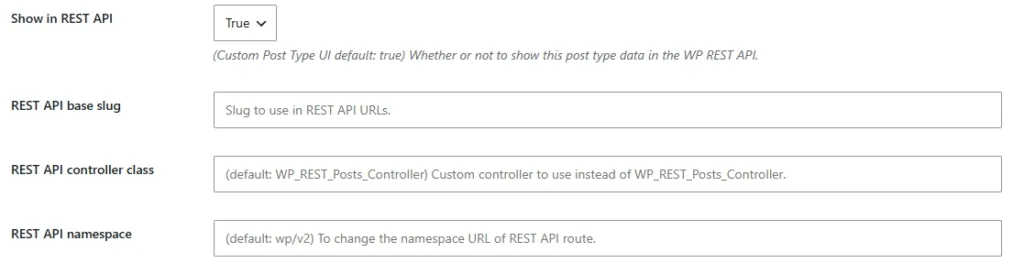
Show in REST API
I almost always enable this.
Even if you’re not using the Block Editor today, many WordPress features depend on the REST API.
Keeping this enabled also improves compatibility with modern plugins and future development.
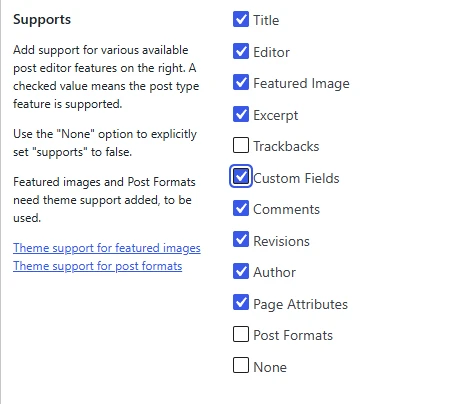
Supports
This determines which editing features appear on the editing screen.
For Projects, I normally enable:
- Title
- Editor
- Featured Image
- Excerpt
- Revisions
You can also enable:
- Author
- Comments
- Page Attributes
- Custom Fields
Remember that ACF provides its own custom fields, so WordPress’s default Custom Fields panel usually isn’t necessary.
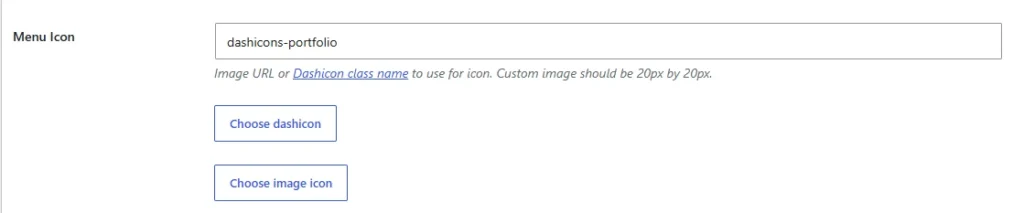
Menu Icon
A custom icon makes the dashboard easier to navigate.
For Projects, something like:
dashicons-portfolio
works well.
WordPress includes hundreds of Dashicons that you can choose from.
Menu Position
This simply controls where the menu appears inside the dashboard.
I usually leave this blank unless the client specifically requests a different order.

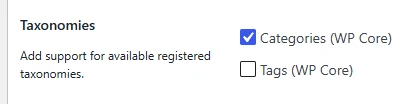
Taxonomies
If Projects need categories or tags, attach them here.
For example:
- Project Categories
- Technologies
- Industries
Keeping taxonomies separate from custom fields makes filtering much easier later.
Developer Tip
I usually spend a few extra minutes planning the content structure before clicking Save Post Type.
Ask yourself questions like:
- Will this content need categories?
- Will it need an archive page?
- Will editors search it frequently?
- Will visitors filter it?
Thinking about these requirements early often prevents unnecessary changes later.
Creating Custom Fields in ACF
Once the Custom Post Type has been created, the next step is adding the structured information that belongs to each project.
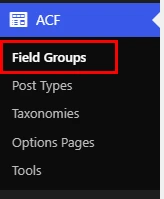
Go to:
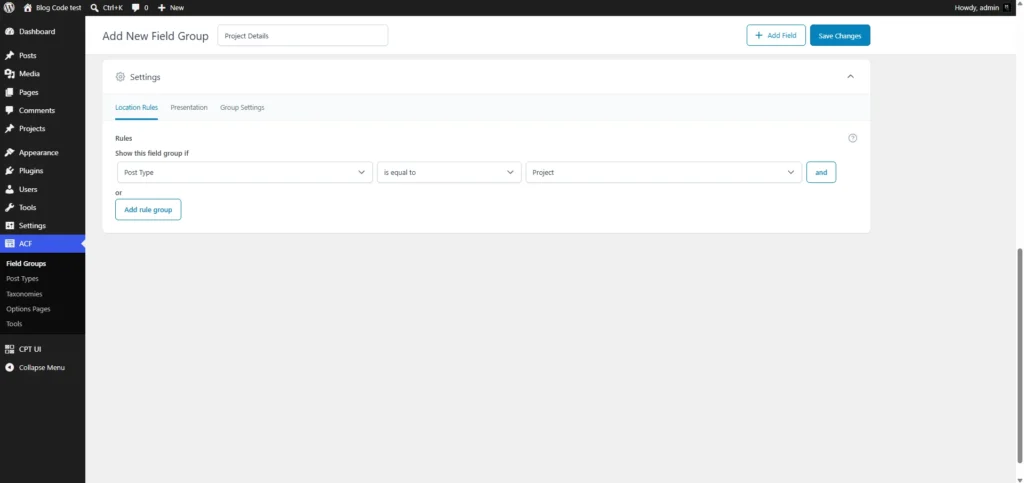
ACF → Field Groups → Add New
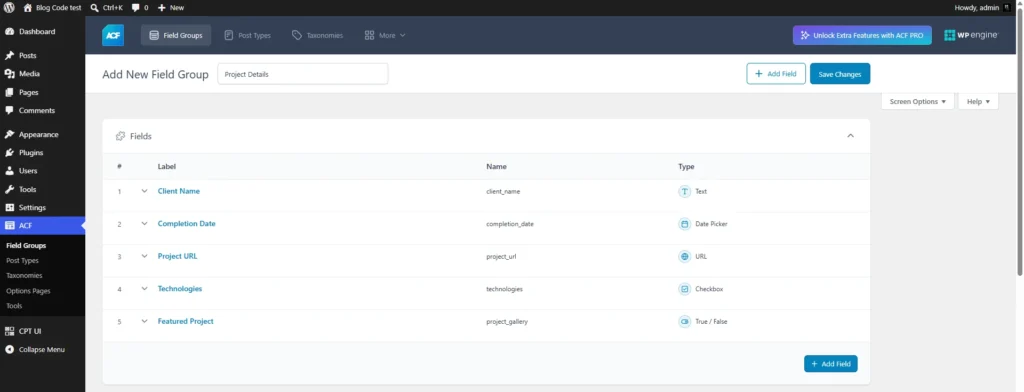
Create a field group called:
Project Details
Now begin adding the fields.
A typical Projects field group could contain:
| Field Label | Field Name | Field Type |
|---|---|---|
| Client Name | client_name | Text |
| Completion Date | completion_date | Date Picker |
| Project URL | project_url | URL |
| Technologies | technologies | Checkbox |
| Featured Project | featured_project | True / False |
One thing I appreciate about ACF is how readable the field names become later in templates.
For example:
client_name
is far easier to understand than something vague like:
field1
Using meaningful field names will save you a lot of time when you revisit the project months later.
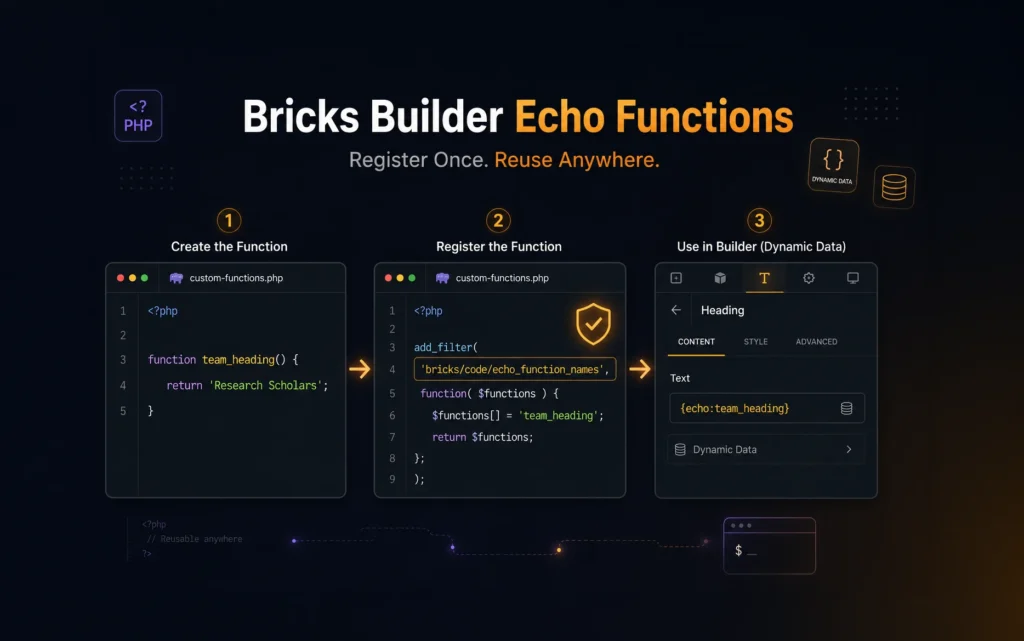
Once you’ve created your fields, the next step is displaying them on the frontend. If you’re using Bricks Builder, my article on Bricks Builder Echo Functions explains how to output custom PHP values and extend Bricks’ dynamic data capabilities.
Assigning the Field Group
At the bottom of the field group editor, configure the Location Rules.
Post Type
is equal to
Project
Once you publish the field group, WordPress automatically displays those fields whenever someone creates or edits a Project.
No additional configuration is required.
Creating Your First Project
Before moving to frontend development, create two or three sample projects.
This helps verify:
- Every field works correctly.
- Editors understand the interface.
- Your data structure makes sense.
- Nothing important has been forgotten.
I’ve found that entering real sample content often exposes missing fields much earlier than planning alone.
Creating a Custom Post Type in ACF
When ACF 6.1 was released in April 2023, it introduced native Custom Post Type and Taxonomy registration.
Instead of switching between CPT UI and ACF, you can now build the entire content structure from one interface.
Note: Custom Post Type registration is available in both the free and Pro versions of ACF starting with version 6.1. If you don’t see the Post Types menu, check that you’re running ACF 6.1 or later.
Navigate to:
ACF → Post Types
Click Add Post Type.
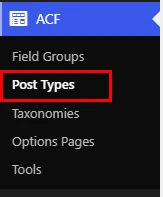
The setup feels familiar if you’ve previously used CPT UI.
You’ll enter:
- Post Type Key
- Singular Label
- Plural Label
For our example:
| Setting | Value |
|---|---|
| Post Type Key | project |
| Singular Label | Project |
| Plural Label | Projects |
Below these basic settings, ACF also lets you configure:
- Visibility
- Archive
- Rewrite Rules
- REST API
- Supports
- Menu Position
- Menu Icon
- Capabilities
- Taxonomies
Most of these options correspond closely to the ones you’ve already seen in CPT UI.
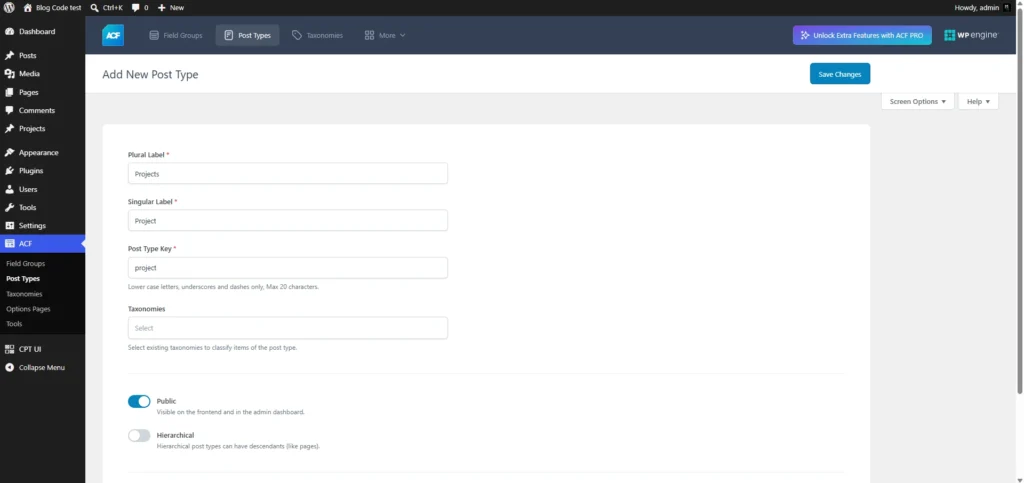
After saving the post type, simply return to Field Groups and assign your Project Details field group to the new Project post type exactly as before.
From that point onward, the editing experience is almost identical.
The biggest difference is that both the content structure and the custom fields now live inside the same plugin.
CPT UI vs ACF
So which workflow should you choose today?
Here’s the approach I generally follow.
| Situation | Recommendation |
|---|---|
| Existing website already using CPT UI | Keep using CPT UI |
| Brand-new website | Register the post type in ACF |
| Existing team already familiar with CPT UI | Continue with CPT UI |
| Already using ACF extensively | Keep everything inside ACF |
| Building reusable plugins or themes | Register post types in PHP |
For new client websites, I now create the Custom Post Type directly in ACF.
Having the post type, taxonomies, and field groups managed in one place makes the project easier to understand, especially when returning to it months later.
That said, I don’t migrate older projects just to remove CPT UI. If the existing setup is stable and easy to maintain, leaving it alone is often the better decision.
Best Practices
Once you’ve built a few WordPress websites using Custom Post Types, you’ll start developing your own workflow. Over the years, these are the practices I’ve found to be the most effective.
Plan Your Content Structure Before Creating Anything
It’s tempting to jump straight into creating a Custom Post Type and adding fields, but spending a few minutes planning the content model usually saves hours later.
For example, if you’re creating a Projects section, write down every piece of information you want editors to enter.
- Client Name
- Completion Date
- Project URL
- Technologies Used
- Project Gallery
- Featured Project
This simple exercise often reveals whether some information belongs in a custom field, a taxonomy, or the standard WordPress editor.
Keep Post Type Keys Simple
Always use singular, lowercase keys without spaces.
project
event
testimonial
team_member
Although visitors will eventually see URLs like /projects/, WordPress internally identifies the post type by its key.
Changing this key after you’ve started adding content isn’t recommended because existing posts are associated with that identifier.
Use Meaningful Field Names
Field names aren’t just for ACF—they become part of your templates and custom code.
Instead of:
field1
field2
field3
use descriptive names such as:
client_name
completion_date
project_url
featured_project
Months later, you’ll immediately understand what each field represents without opening ACF.
Use Native WordPress Fields Whenever Possible
ACF is powerful, but not every piece of data needs a custom field.
WordPress already provides several useful fields.
| WordPress Feature | Typical Use |
|---|---|
| Title | Project or Event Name |
| Featured Image | Main image |
| Editor | Detailed description |
| Excerpt | Short summary |
Using these built-in features keeps the editing screen cleaner and makes your content more compatible with themes and plugins.
Use Taxonomies Instead of Multiple Checkboxes
If content needs to be grouped, filtered, or searched, a taxonomy is usually the better solution.
For example, instead of creating several True/False fields like:
- WordPress Project
- Laravel Project
- React Project
create a Technology taxonomy.
Later, visitors can filter projects by technology, and editors can add new technologies without changing the field group.
Understand When to Enable the REST API
One setting that often confuses developers is Show in REST API.
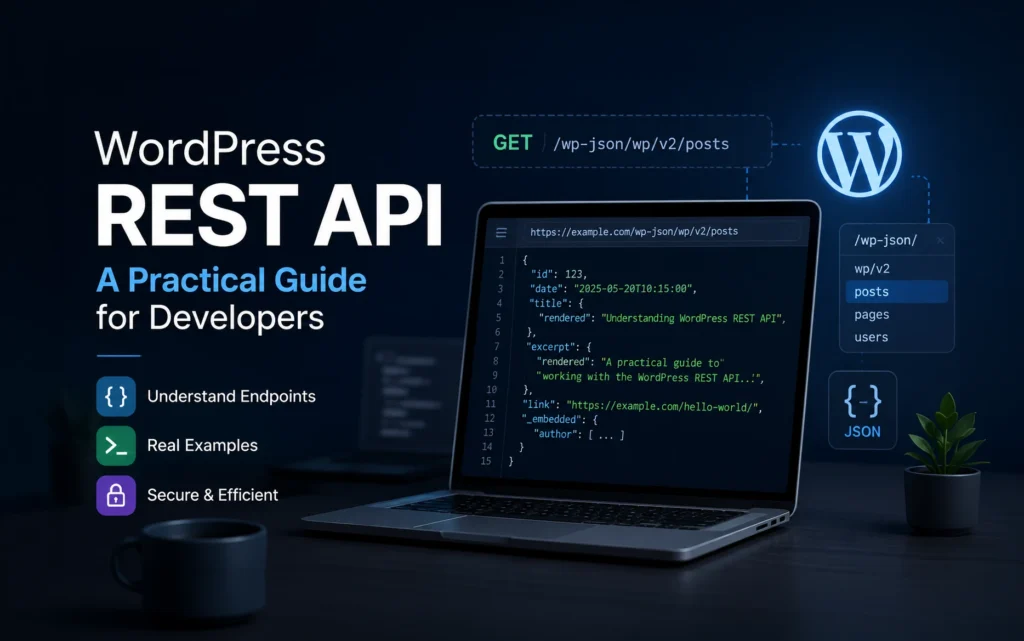
The WordPress REST API allows WordPress to expose its content in a structured JSON format that other applications can read.
For example, a Projects Custom Post Type could be accessed through an endpoint like:
https://example.com/wp-json/wp/v2/project
Instead of returning an HTML page, WordPress returns structured data containing information such as the project title, content, featured image, publication date, and other available fields.
Even if you aren’t building a headless website, many modern WordPress features depend on the REST API.
These include:
- The Block Editor (Gutenberg)
- WordPress mobile apps
- Headless WordPress frameworks
- Third-party integrations
- Many modern plugins and page builders
Unless you have a specific reason to disable it, I recommend leaving Show in REST API enabled.
Register Custom Post Types in PHP for Reusable Plugins
For client websites, I now prefer registering Custom Post Types directly in ACF because everything lives in one place.
However, when building reusable plugins or distributable themes, I still register them in PHP. This keeps the plugin self-contained, removes the dependency on ACF, and makes it easier to reuse across multiple projects.
If you’ve never created a custom plugin before, I recommend reading my guide on How to Create Your First WordPress Plugin (Beginner’s Guide). It explains the basic plugin structure and provides a solid foundation before you start registering Custom Post Types in code.
Common Mistakes
Even experienced developers occasionally make these mistakes.
Knowing about them early can save a lot of troubleshooting later.
Registering the Same Post Type Twice
Don’t register the same post type in both CPT UI and ACF.
Both plugins will attempt to register the same key, which can result in conflicting settings and unpredictable behaviour.
Choose one approach and stick with it.
Changing the Post Type Key
Changing the post type key after content already exists is one of the easiest ways to create problems.
For example:
project
becoming
portfolio
WordPress stores every post against its post type key. If the key changes, the existing content no longer belongs to the newly registered post type.
If you ever need to rename a post type, plan the migration carefully.
Creating Too Many Custom Fields
Not everything needs its own field.
If editors only need to write a paragraph of content, the standard WordPress editor is usually the better choice.
Reserve custom fields for structured information that you’ll display or query separately.
Using the Wrong Field Type
ACF offers many different field types.
Choose the one that best matches the data.
For example:
- Date Picker instead of Text for dates.
- URL instead of Text for links.
- Select instead of Text when editors should choose from predefined values.
- True/False instead of typing Yes or No.
Using the correct field type improves validation and creates a better editing experience.
Ignoring the Editor Experience
It’s easy to focus on the frontend and forget about the people entering the content.
Before handing over a website, create a few sample entries yourself.
Ask questions like:
- Are the field labels easy to understand?
- Is the editing screen uncluttered?
- Are related fields grouped together?
- Can someone unfamiliar with the website use it without training?
Small improvements here often make the biggest difference for clients.
Final Thoughts
For years, CPT UI and ACF formed my standard workflow for creating structured WordPress websites. CPT UI handled the Custom Post Types, while ACF managed the custom fields. It was simple, reliable, and it’s still the approach you’ll find on many existing websites.
As projects become more complex, you’ll often want to create custom management screens for editors instead of relying entirely on the default WordPress interface. That’s where custom admin pages become useful.
Since ACF 6.1 introduced native Custom Post Type registration, my workflow for new projects has gradually changed. Having the post types, taxonomies, and field groups managed from one plugin makes projects easier to understand and reduces the number of plugins I need to maintain.
That doesn’t mean CPT UI is outdated. If an existing website already uses it and everything is working well, I usually leave it exactly as it is. Migrating purely to remove a plugin rarely provides enough benefit to justify the time involved.
At the end of the day, both approaches produce the same result. The best choice depends on the project, the team maintaining it, and how you prefer to organise your workflow.
Frequently Asked Questions
A Custom Post Type is a content type that extends the default Posts and Pages in WordPress. It allows you to create dedicated sections for content such as Projects, Team Members, Testimonials, Events, Products, or Portfolios.
A Custom Post Type defines the type of content you’re creating.
Custom Fields store additional structured information about each item within that content type.
For example, a Project is a Custom Post Type, while the Client Name, Completion Date, Technologies Used, and Project URL are Custom Fields.
Yes. Beginning with ACF 6.1, both the free and Pro versions support registering Custom Post Types and Taxonomies. If you don’t see the Post Types menu, make sure you’re running ACF 6.1 or later.
Not necessarily. For new projects, ACF can handle both Custom Post Types and Custom Fields from the same interface.
However, many existing websites still use CPT UI, and there’s usually no advantage in migrating a stable website solely to remove one plugin.
The WordPress REST API allows WordPress content to be accessed programmatically in JSON format. It powers features such as the Block Editor, mobile apps, headless WordPress websites, and many third-party integrations. Enabling Show in REST API makes your Custom Post Types available to these tools.
If you’re building a reusable plugin or distributable theme, registering Custom Post Types in PHP is generally the better approach because it removes the dependency on ACF.
For client websites where ACF is already installed, registering them directly in ACF is often more convenient.
Yes. As long as the Post Type Key remains exactly the same, WordPress will continue using the existing content. Before removing CPT UI, verify that the new ACF registration matches the original configuration.
Yes. Bricks Builder has excellent support for ACF through Dynamic Data, allowing you to display text, images, URLs, galleries, and many other field types without writing custom PHP for most projects.
Resources
For more detailed information, the following official resources are worth bookmarking.