A few days ago, one of my partners contacted me with an interesting WordPress migration problem.
He had been working on the staging version of a client’s website. The changes were extensive: the design had been updated, pages had been modified, and a considerable amount of cosmetic work had already been completed.
The staging site was finally ready to go live.
But there was a problem.
While the staging work was happening, the client had continued using the existing live website and published several new blog posts.
We now had two versions of the website containing changes we wanted to keep.
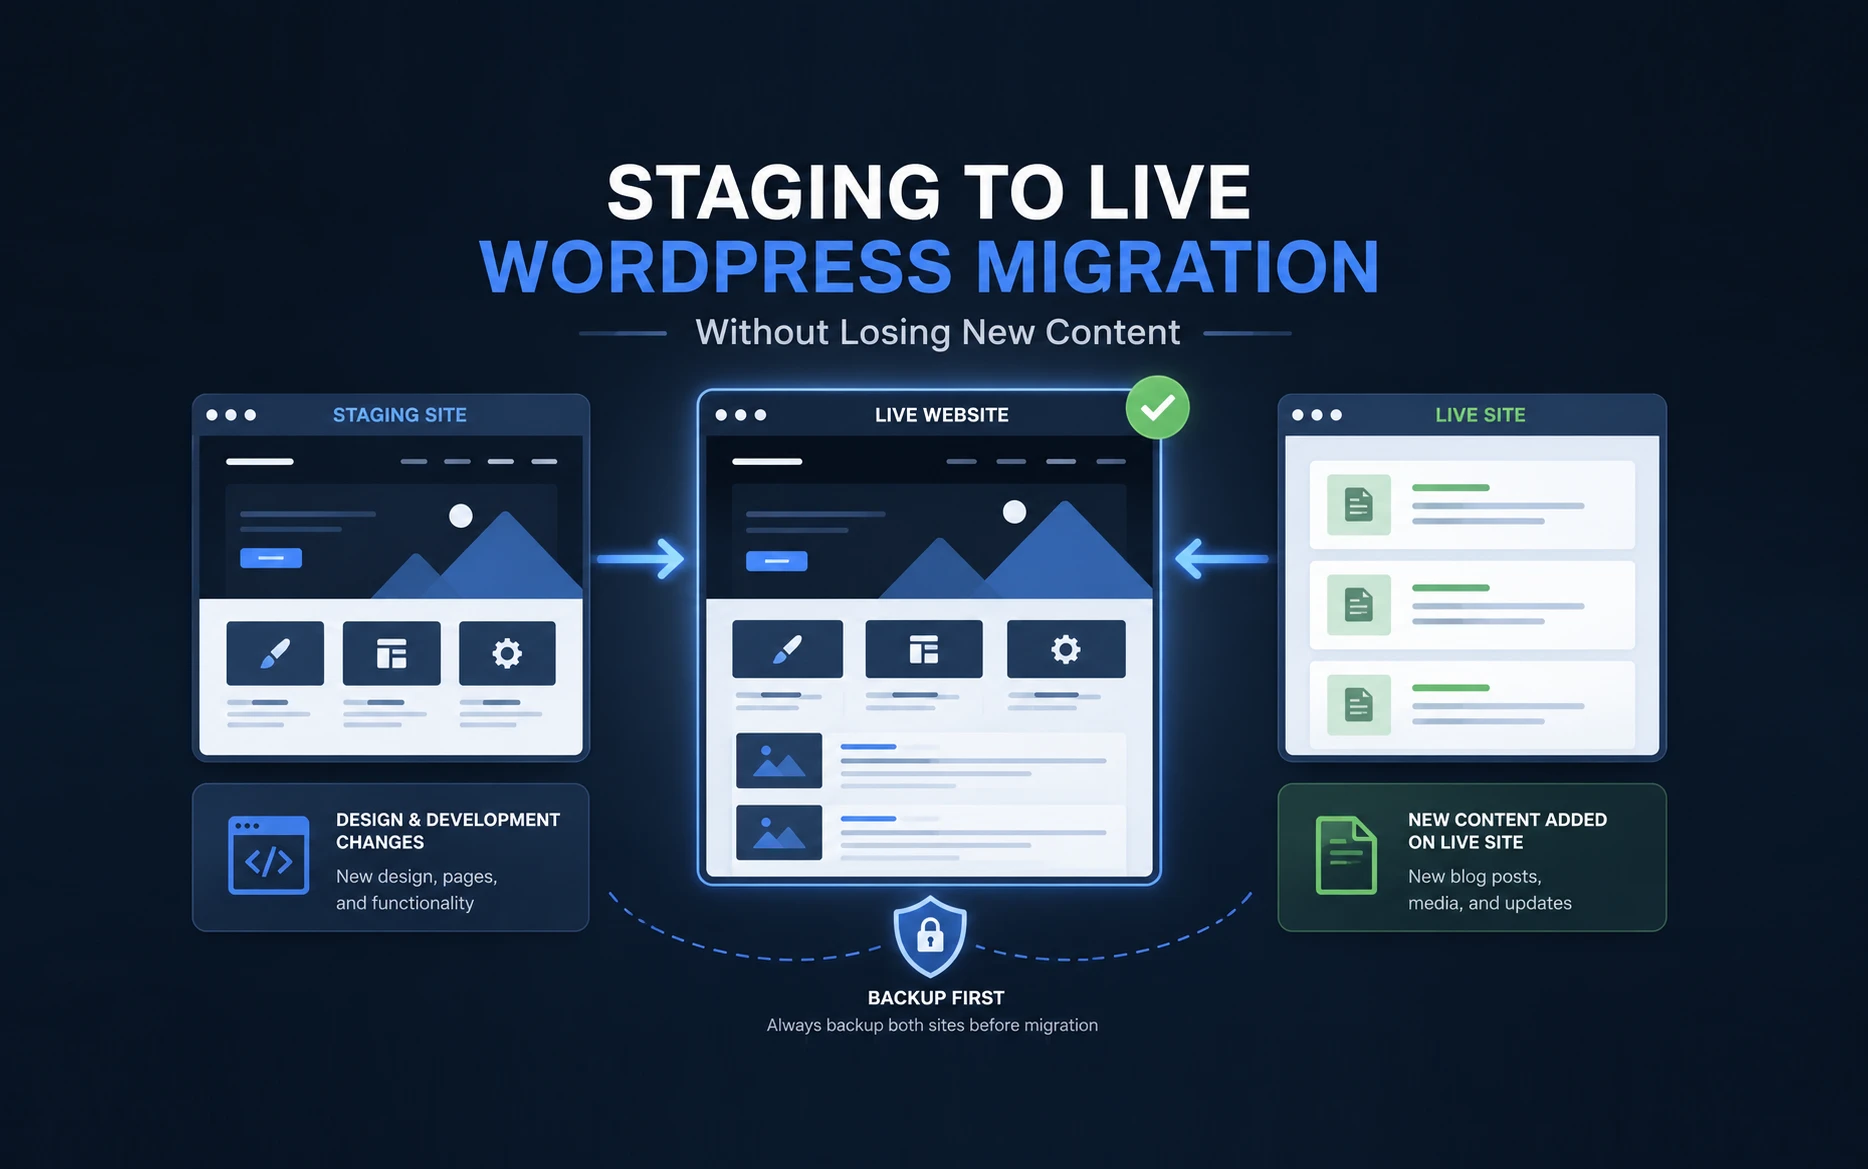
The staging site had the latest design and development changes, while the live site had the latest content.
A normal staging to live WordPress migration could overwrite the production database and remove those newly published posts.
This is one of those WordPress migration problems that sounds complicated at first, but once you understand what is happening, there are a couple of practical ways to handle it.
Why a Staging to Live WordPress Migration Can Lose Content
When we create a staging website, we’re normally creating a copy of the production website at a particular point in time.
Imagine I create staging on August1.
Development continues on staging for the next three weeks.
Meanwhile, the client publishes articles on the live website on August 5, August 12 and August 20.
By August 21, staging and production are no longer identical.
The staging database contains all the development changes, but it knows nothing about those three new articles.
If I now migrate the complete staging website to production and replace the live database, those posts can disappear.
The design is newer on staging.
The content is newer on production.
That’s the real problem we’re trying to solve.
Why Not Just Copy the New Blog Posts from the Database?
At first, copying the new posts directly from the database might sound like the easiest solution.
Unfortunately, WordPress content isn’t quite that simple.
The primary post record is stored in the wp_posts table, but information related to that post can exist elsewhere.
Post metadata is stored in wp_postmeta. Categories and tags involve taxonomy tables and relationships. Featured images are stored as WordPress attachment records, while the actual files normally exist inside wp-content/uploads.
Custom fields and plugins can introduce additional relationships.
So I wouldn’t start copying individual database tables between staging and production unless there is a specific reason to work at database level and you understand all the relationships involved.
For normal blog content, WordPress already gives us a safer way to move it.
Before Doing Anything: Back Up Both Websites
Before attempting either of the methods below, create complete backups of both staging and production.
You need a copy of the live website before changing it, but don’t forget the staging site. You’ve probably spent days or weeks working on it, so that version is just as important.
I want complete backups containing the database, WordPress files and uploads.
I also don’t rely entirely on the hosting provider’s automatic backups for a migration like this. I prefer having my own copy that I can restore independently.
If you’re using All-in-One WP Migration Pro, this becomes particularly easy.
I’ve been using the Pro version for my WordPress migrations, and creating a complete site archive is practically a one-click operation.
Before starting the migration, I export both websites:
Live site → Export → Download archive
Staging site → Export → Download archive
I then keep both archives safely on my computer.
That means I have an independent copy of exactly how both websites looked before I started making migration changes.
I keep these archives until the new production website has been thoroughly tested and I’m completely satisfied that everything is working correctly.
For me, this has become a standard part of any staging to live WordPress workflow.
Approach 1: Export the New Posts, Migrate Staging, Then Import Them
The first method is straightforward when only a relatively small amount of content has been added to production.
The workflow is:
Live → Export new posts → Migrate staging to live → Import new posts
WordPress has built-in export and import tools that make this possible without manually moving database records.
Step 1: Export the New Posts from the Live Website
On the live website, go to:
Tools → Export
Select:
Posts
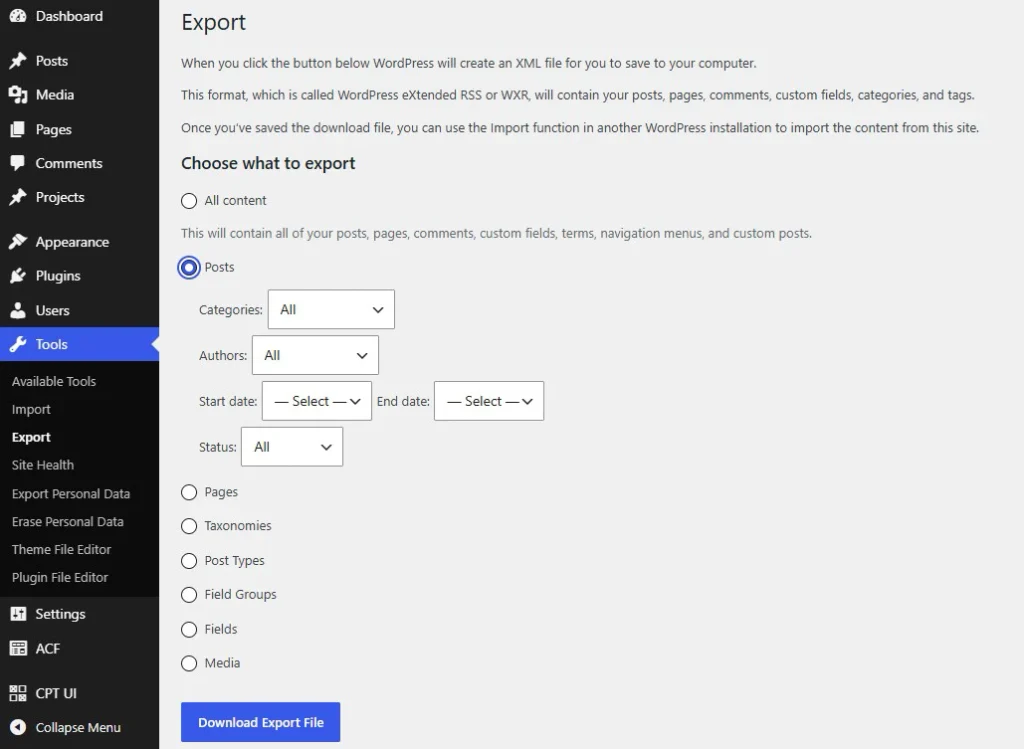
WordPress allows you to filter the export by category, author, date range and status.
The date filter is especially useful for this situation.
For example, if staging was created on July 1, I can export the posts published after that date.
WordPress creates a WXR/XML export file containing the selected content and related information.
Download the XML file and keep it together with your migration backups.
Export the Media Separately
There’s one additional step before moving ahead with the migration: we need to export the new media separately.
When you go to Tools → Export, WordPress asks you to choose what you want to export. If you select Posts, you’re exporting the posts; you can’t select Media at the same time as a second content type.
So after downloading the posts export, go back to:
Tools → Export → Media

Now use the date range to export the media uploaded after the staging site was created.
For example, if staging was created on August 1, I would first export the new posts published after August 1 and then create a second export for media uploaded after August 1.
I now have two XML files:
Posts export — the new articles published on the live website.
Media export — the new media uploaded to the live website during the same period.
Keep both files together with your migration backups.
Step 2: Freeze New Content on the Live Site
Before starting the final migration, ask the client not to publish or edit anything until you’re finished.
This is important.
Suppose I export the new posts at 10:00 AM.
At 10:15 AM, the client publishes another article.
At 10:30 AM, I replace the production site with staging.
That 10:15 article isn’t in my export and isn’t on staging. It could therefore disappear.
A short content freeze prevents this.
The website doesn’t necessarily have to go offline. You simply need to make sure nobody is creating or modifying production content while you’re synchronizing and migrating the websites.
Step 3: Move the Staging Site to Live
Now perform the complete staging migration.
In this particular situation, we’re assuming the staging changes are extensive enough that moving individual templates or design settings isn’t practical.
The staging website needs to replace the existing production website.
If I’m using All-in-One WP Migration Pro, I can export the finalized staging site and import that archive into production.
Once the migration finishes, I don’t immediately start restoring the new blog posts.
First, I check that the migration itself has worked.
I normally verify:
- Homepage
- Important internal pages
- Header and footer
- Navigation
- Forms
- Responsive layouts
- Plugins
- Permalinks
- Custom functionality
- Browser console errors
Once I’m confident that the staging site is working properly on production, I move to the content import.
Step 4: Import the New Blog Posts
Install the WordPress Importer
Before importing the posts and media, you might need to install the WordPress Importer.
Go to:
Tools → Import
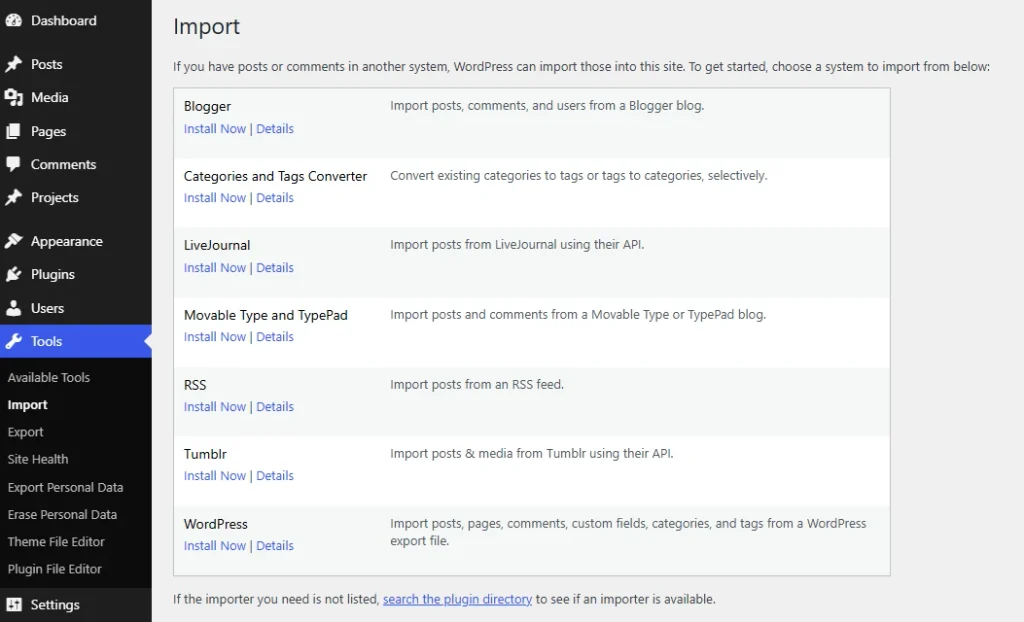
You’ll see a list of importers for different platforms. Find WordPress at the bottom of the list.
If the importer isn’t already installed, you’ll see:
Install Now
Click it to install the WordPress Importer plugin.
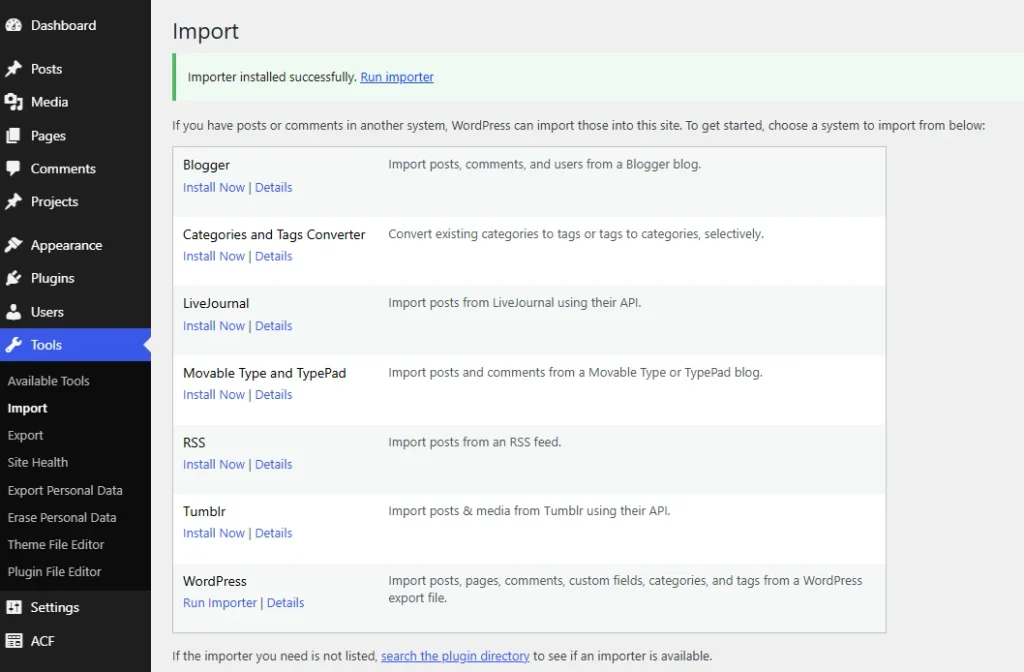
Once the installation finishes, the option changes to:
Run Importer
You only need to install the importer once on that WordPress installation.
Import the Posts and Media
Now we can import the two XML files we exported earlier.
Go to:
Tools → Import → WordPress → Run Importer
I would import the posts XML file first.

Upload the file and follow the importer steps. WordPress will allow you to assign the imported content to an existing user or create an appropriate author.
Once the posts import is complete, run the WordPress Importer again and upload the media XML file.
When importing the media, make sure you enable:
Download and import file attachments

This tells WordPress to retrieve the actual media files referenced by the export.
Remember that the XML file itself doesn’t contain the physical images. The original files still need to be accessible when WordPress attempts to download them.
After both imports are complete, don’t assume everything has transferred alright.
Check the imported articles individually.
I would verify:
- Title
- Content
- Publication date
- Author
- Categories
- Tags
- Featured image
- Images within the article
- URL and slug
- Custom fields
- Internal links
Don’t check only inside the WordPress editor.
Open the articles on the front end and make sure they actually look and behave correctly.
This extra verification is particularly important for media. If an attachment hasn’t transferred correctly, it’s much better to discover it immediately while you still have your original live-site backup available.
When Approach 1 Makes Sense
I would choose this method when the difference between staging and production is small and predictable.
If the client has published five new blog posts and nothing else significant has happened on production, exporting those posts before the migration and importing them afterwards is a practical solution.
But there is one drawback.
You’re importing and testing the missing content after you’ve already replaced the production website.
When the staging changes are extensive, I prefer another approach.
Approach 2: Import the Live Content Into Staging Before Going Live
Instead of fixing the content difference after deployment, we can fix it before deployment.
The workflow becomes:
Live → Export new content → Import into staging → Test everything → Migrate staging to live
For a substantial redesign, this is the approach I personally prefer.
The staging website already contains the latest design and development work.
What it doesn’t contain is the content created on production after staging was originally copied.
So I bring that content into staging first.
The goal is to turn staging into the complete final version of the website before touching production.
Step 1: Export the Latest Content from Production
Go to the live website:
Tools → Export → Posts
Use the date filter to export the articles published after the staging website was created.
Download the XML file.
As with Approach 1, pay attention to the media associated with those posts and keep the complete production backup available.
Step 2: Import the New Content Into Staging
Now open the staging website and go to:
Tools → Import → WordPress
Upload the WXR/XML file exported from production.
Enable:
Download and import file attachments
Complete the import.
Staging should now contain both sets of changes:
Latest design and development + latest production content
This is the point where this method becomes particularly useful.
Step 3: Test the Real Content Against the New Design
Now I can see exactly how the client’s latest articles behave with the redesigned website before anything reaches production.
This can reveal problems that aren’t obvious when testing only older staging content.
For example:
Does the new featured image work properly with the redesigned single-post template?
Are headings styled correctly?
Do images fit within the new content width?
Are category archive pages displaying the new posts?
Are custom fields working?
Are related-post sections picking up the new content?
Are the URLs and slugs correct?
Does everything work properly on mobile?
If the redesign includes significant changes to the blog templates, this step becomes even more valuable.
I’d much rather discover a problem here than after the website has gone live.
Step 4: Create the Final Staging Backup
Once I’ve imported the latest content and thoroughly tested the staging site, I create another complete backup.
With All-in-One WP Migration Pro, I export the entire staging website again and download the archive.
This particular archive is important.
It now contains:
- The redesigned website
- Development changes
- Latest production posts
- Imported media
- Final tested database
This becomes my deployment package.
Immediately before deployment, I also take one more fresh backup of the existing production website and download it.
If anything unexpected happens during the staging to live WordPress migration, I now have a clean recovery point for both versions.
Step 5: Freeze Production Content
At this point, ask the client to stop publishing or editing content until deployment is finished.
This final content freeze is essential.
If another article is published after the last live-to-staging export, staging will immediately become outdated again.
For a normal business website, this freeze shouldn’t need to last very long.
Step 6: Migrate the Final Staging Site to Production
At this stage, staging contains everything I want on the final website:
- Latest design
- Latest development work
- Latest blog posts
- Latest associated media
Now I can migrate the complete staging website to production.
If I’m using All-in-One WP Migration Pro, I already have the finalized staging archive ready. I import that archive into the production installation and let the migration complete.
Then I test the live site again.
Even if staging worked perfectly, don’t assume production will behave identically.
Check caching, SSL, forms, permalinks, plugins, responsive layouts, scripts and any custom functionality.
I also open the newly imported blog posts and verify them once again on the final production site.
Only after these checks are complete do I consider the migration finished.
Why I Prefer Approach 2 for an Extensive Redesign
Both approaches solve the same problem, but they solve it at different stages.
Approach 1 is essentially:
Deploy → Import missing content → Test
Approach 2 is:
Import missing content → Test → Deploy
I personally prefer the second sequence whenever the staging changes are extensive.
Production shouldn’t be the place where I first discover that an imported featured image doesn’t work with the new template or that a custom field isn’t displaying correctly.
If I can create one complete and thoroughly tested version of the website on staging, the final deployment becomes much more predictable.
This has become my preferred workflow when handling a staging to live WordPress migration where production has continued receiving new editorial content.
Don’t Assume Blog Posts Are the Only Live Data That Changed
Before using either approach, there’s one more thing you need to establish.
What exactly has changed on production since staging was created?
A client might tell you:
“We’ve only published a few blog posts.”
Don’t automatically assume that’s everything.
Depending on the website, production might also have received:
- Comments
- New users
- Form submissions stored in the database
- WooCommerce orders
- Customer accounts
- Bookings
- Membership records
- Product changes
- New pages
- Plugin-generated data
The two approaches in this article work particularly well when you’re dealing with a normal content website where the production changes are mainly new posts and their associated media.
An active WooCommerce site is a different situation.
Orders, customer information and stock changes can continue to be written to the database while you’re working on staging. Replacing that production database requires a much more carefully planned synchronization strategy.
The same applies to membership sites, booking systems, LMS websites and other sites that continuously generate transactional data.
Always understand what has changed before deciding how to migrate.
Should You Merge the WordPress Databases Manually?
Technically, you can.
But I wouldn’t make it my first choice for this particular problem.
WordPress content has relationships across several database tables. Posts can have metadata, taxonomy relationships and attachments, while plugins can introduce additional tables and relationships.
A manual database merge can therefore create subtle problems.
You could successfully transfer a post while breaking its featured image relationship, taxonomy association or plugin metadata.
For a manageable number of newly published articles, the WordPress export/import workflow is easier to understand, test and reverse.
Sometimes the technically more sophisticated solution isn’t the better solution.
What If the Client Added Only One or Two Posts?
There’s another option that is easy to overlook.
Manually recreate them.
If the client has added only one or two straightforward blog posts since staging was created, copying those posts to staging manually can be quicker than setting up an export/import workflow.
Copy the content, upload the images, assign the categories and tags, recreate any required metadata, and verify the posts.
Then proceed with Approach 2 and migrate the completed staging website.
I wouldn’t introduce unnecessary complexity just because a more technical migration method exists.
The amount and type of changed content should determine the solution.
A Better Workflow for Future Staging Projects
This situation also highlights something worth discussing with clients before beginning a major redesign.
If development is going to continue on staging for several weeks while the production website remains active, decide at the beginning how new production content will be handled.
For content-driven websites, I prefer a simple arrangement:
Design and development happen on staging. Editorial content can continue on production, but new production content must be synchronized back to staging before final deployment.
Then establish a short content freeze immediately before going live.
That prevents you from reaching the end of a long development project and suddenly realizing that staging and production have been independently changing for several weeks.
In my experience, defining this process at the beginning makes the final migration much easier for both the developer and the client.
Common Mistakes During a WordPress Staging Migration
The biggest mistake is pushing staging to production without first checking whether anything has changed on the live site.
Another is assuming that the WordPress XML export is a complete website backup. It isn’t. It’s a content-transfer format, which is why I still create and download complete site backups separately.
Don’t assume that the attachment import has successfully transferred every image either. Check the media after importing.
Also, don’t focus exclusively on blog posts. Make sure there aren’t other forms of live database activity that need to be preserved.
And don’t forget the final content freeze.
Even a carefully planned migration can lose content if someone continues changing production after you’ve performed the final synchronization.
Final Thoughts
This article came from a real problem one of my partners faced with a client website.
The redesigned staging website was ready, but the client had continued publishing new articles on production.
The solution isn’t to blindly overwrite one website with the other.
You first need to understand which changes exist on staging and which changes exist on production, then bring those two versions together safely.
If there are only a few new posts, exporting them, migrating staging, and importing them afterwards is a perfectly practical solution.
When the staging changes are extensive, however, I prefer bringing the latest production content into staging first.
That lets me build one complete version of the website, test it thoroughly, create a final backup, and only then deploy it.
Whichever method you choose, keep your own complete backups, check the media carefully, identify all production data that has changed, and establish a short content freeze before the final migration.
A staging to live WordPress migration becomes much easier when you treat content synchronization as part of the deployment rather than something to fix after the site has gone live.
If you’ve dealt with staging and production sites that had both changed independently, I’d be interested to know how you handled the final migration.
FAQs
A staging to live WordPress migration is the process of moving changes developed and tested on a staging website to the production website that visitors actually use. Extra care is required when production has received new content since staging was created.
Yes. If you replace the production database with an older staging database, posts created on production after staging was copied can be lost. Export or synchronize that content before replacing the live database.
Yes. Go to Tools → Export → Posts. WordPress provides filters including category, author, date range and status, making it possible to target content published after staging was created.
The WXR/XML export contains information about the content and attachments, but it isn’t an archive containing all of your physical media files. During import, enable Download and import file attachments and verify the media afterwards.
For an extensive redesign, this is my preferred approach. It allows you to combine the latest production content with the new staging design and test the complete website before deploying it.
I wouldn’t recommend this as a general solution. Posts can depend on metadata, taxonomy relationships, attachments and plugin-specific information stored elsewhere in the database.
You should establish a short content freeze during the final synchronization and deployment. Otherwise, someone could publish new content after your final export, leaving staging out of date again.
No. The WordPress export is primarily for transferring content. I prefer creating separate complete site backups before migration and downloading those archives for safekeeping.
For a normal content website with extensive staging changes, I personally prefer importing the latest production content into staging first, testing everything there, and then migrating the finalized staging website to production.
Not without additional planning. WooCommerce production sites can continuously receive orders, customer records, stock changes and other transactional data. Those sites need a synchronization strategy that accounts for all live database activity, not just posts.
Useful Resources
If you’re planning this kind of migration, these related resources are worth keeping handy.
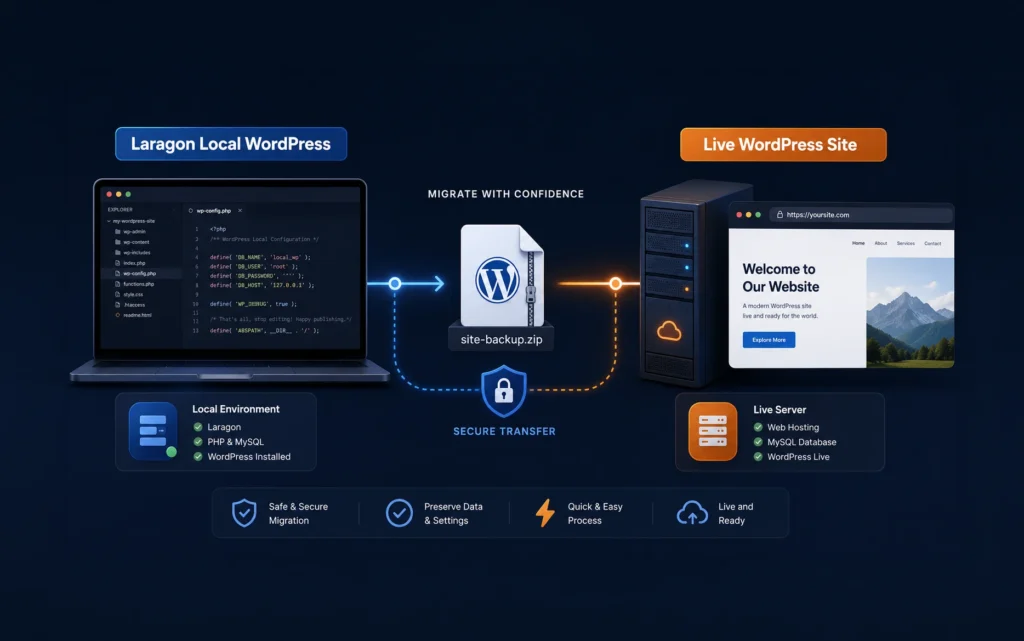
- How to Migrate WordPress from Local to Live Server Without Breaking the Site — My existing Maya Grafix guide covers the more straightforward situation where one complete WordPress installation needs to be moved to another environment.
- How to Create Your First WordPress Plugin (Beginner’s Guide) — Useful when staging changes include custom functionality that should be moved as a reusable plugin rather than being tied to the theme.
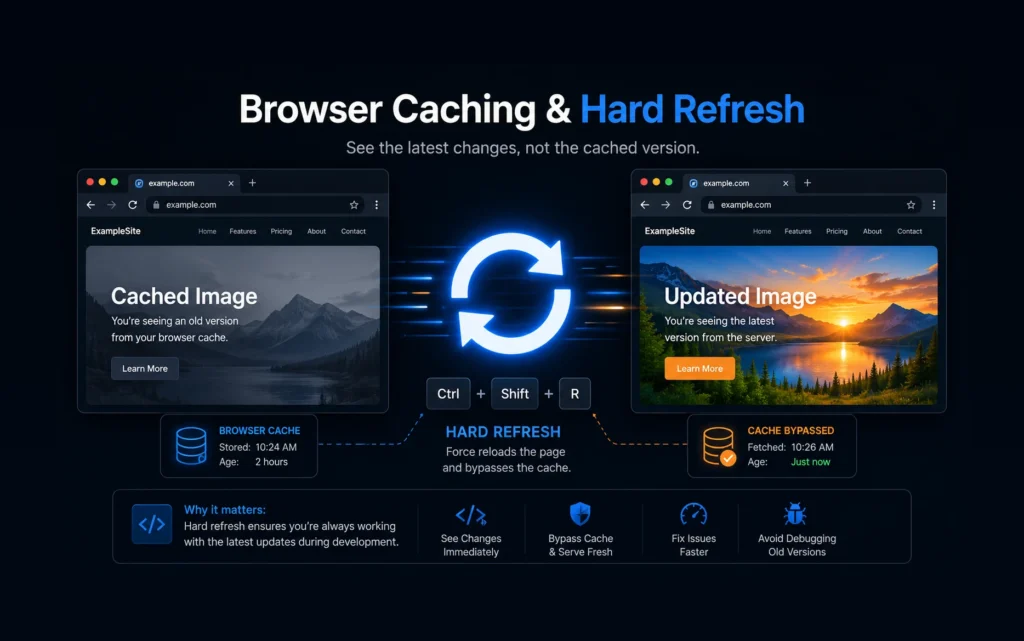
- Why Your Website Still Shows the Old Image After Replacing It (And How to Fix It) — Helpful when caching causes old images or assets to appear after a WordPress migration.
- WordPress Tools: Export documentation — The official WordPress documentation explains the built-in export functionality and the available post filters.
- WordPress Tools: Import documentation — The official documentation covers importing WordPress content into another installation.
- WordPress Importing Content – Advanced Administration Handbook — Useful reference for understanding the WordPress Importer, author mapping and attachment importing.
- There’s also an excellent video tutorial by Wes Theron on Learn WordPress that walks through the WordPress import and export tools in detail.
I recommend watching Tools: Import and Export if you haven’t used these tools before. It’s a useful companion to the process we’ve covered here.
Even better, Learn WordPress provides a practice demo site, so you can try the import and export process yourself without worrying about breaking a real website. If this workflow is new to you, getting your hands dirty on the demo site is probably the best way to understand how the process actually works.