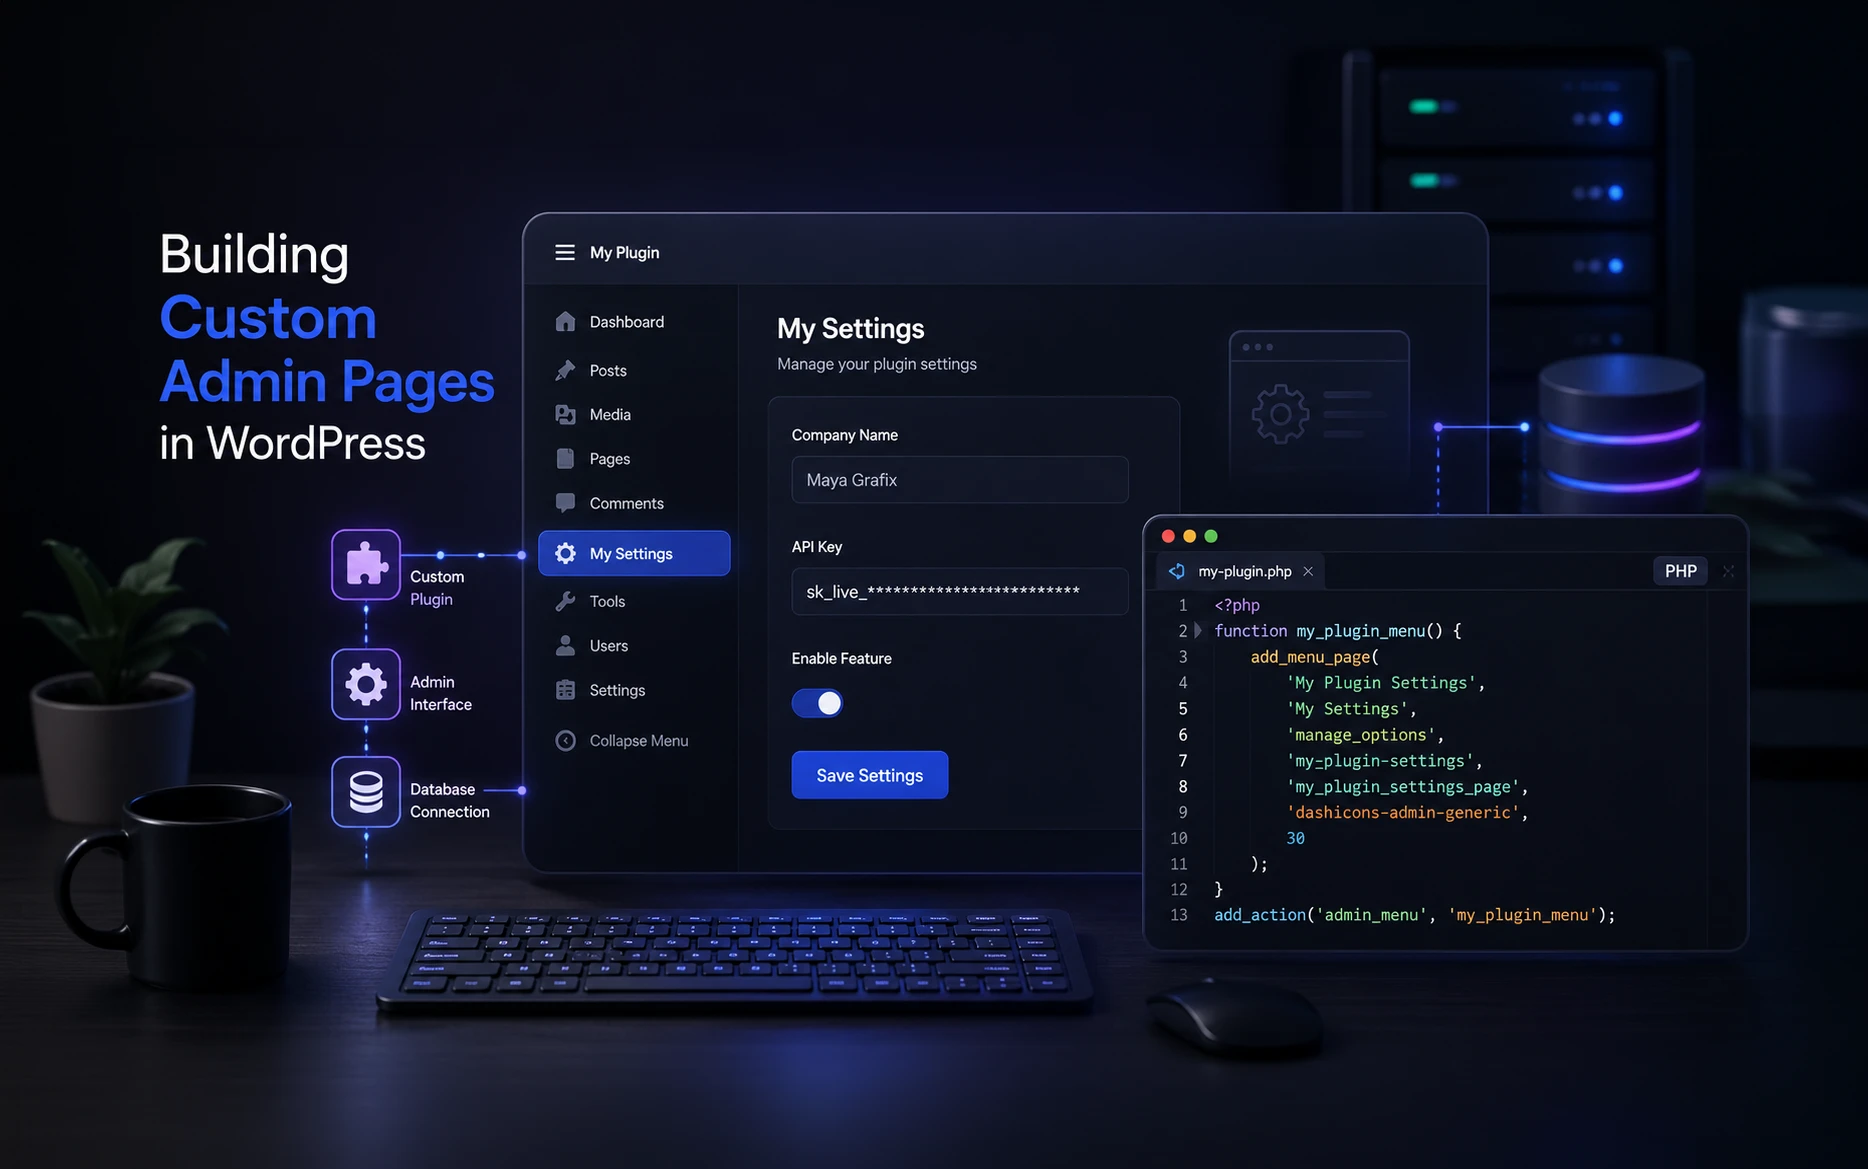
In many WordPress projects, there comes a point where the default admin area is not enough.
Maybe the client needs a simple settings screen.
Maybe you want a custom report page.
Maybe you are building a small internal tool for managing data.
This is where custom admin pages in WordPress become very useful.
I personally prefer building these as small custom plugins instead of adding everything into functions.php. It keeps the code reusable, safer during theme changes, and easier to maintain later.
The Problem
WordPress already gives us posts, pages, custom post types, taxonomies, settings, users, and many other admin screens.
But real projects often need something more specific.
For example:
A client dashboard.
A custom export tool.
A plugin settings page.
A report page.
A project-specific admin utility.
Technically, we can add this code into the active theme. But in my experience, that becomes messy very quickly.
The better approach is to create a small plugin and add your admin page from there.
Why I Prefer a Custom Plugin
Theme files should mostly handle the front-end presentation.
Admin tools, project logic, settings, and custom workflows should live outside the theme whenever possible.
This has become my standard workflow because the custom admin page will continue to work even if the theme changes.
It also makes the feature easier to move to another website.
WordPress provides functions like add_menu_page() and add_submenu_page() for adding custom pages to the admin menu.
Official documentation:
https://developer.wordpress.org/reference/functions/add_menu_page/
https://developer.wordpress.org/reference/functions/add_submenu_page/
The important thing is not just adding the page.
We also need to think about permissions, sanitization, nonces, and how the data is saved.
What We Are Going to Build
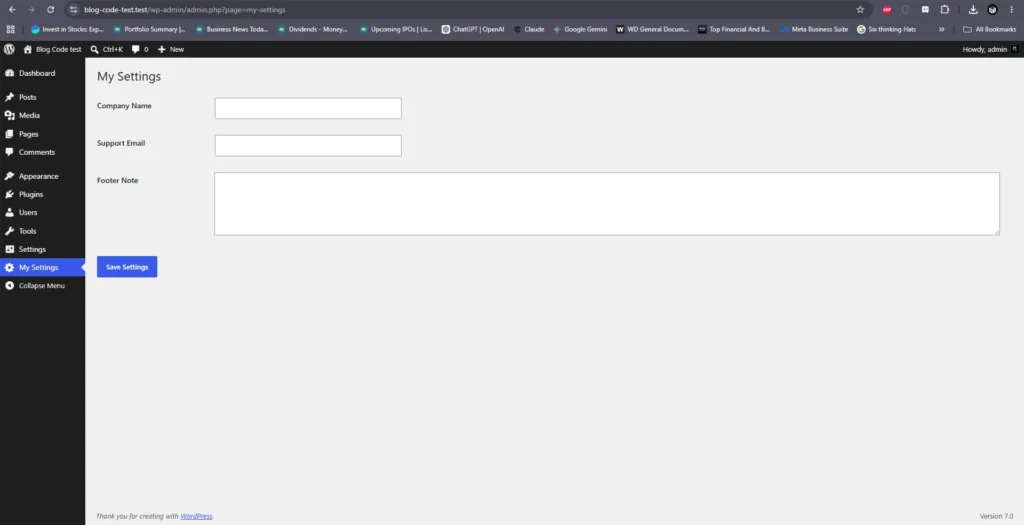
In this example, we will build a simple custom admin page called My Settings.
It will allow the site admin to save:
Company name
Support email
Footer note
This is a simple example, but the same structure can be used for project settings, custom dashboards, reports, API keys, export tools, and many other admin features.
Create the Plugin File
Create a new folder inside plugins:
wp-content/plugins/my-custom-admin-page
Inside that folder, create this file:
my-custom-admin-page.php
Now add this complete plugin code.
<?php
/**
 * Plugin Name: My Custom Admin Page
 * Description: Adds a simple custom admin settings page in WordPress.
 * Version: 1.0.0
 */

if ( ! defined( 'ABSPATH' ) ) {
	exit;
}

/**
 * Register admin menu.
 */
add_action( 'admin_menu', 'my_register_custom_admin_page' );

function my_register_custom_admin_page() {

	add_menu_page(
		'My Settings',
		'My Settings',
		'manage_options',
		'my-settings',
		'my_render_custom_admin_page',
		'dashicons-admin-generic',
		80
	);

}


/**
 * Register settings.
 */
add_action( 'admin_init', 'my_register_custom_settings' );

function my_register_custom_settings() {

	register_setting(
		'my_settings_group',
		'my_company_name',
		array(
			'type'              => 'string',
			'sanitize_callback' => 'sanitize_text_field',
			'default'           => '',
		)
	);

	register_setting(
		'my_settings_group',
		'my_support_email',
		array(
			'type'              => 'string',
			'sanitize_callback' => 'sanitize_email',
			'default'           => '',
		)
	);

	register_setting(
		'my_settings_group',
		'my_footer_note',
		array(
			'type'              => 'string',
			'sanitize_callback' => 'sanitize_textarea_field',
			'default'           => '',
		)
	);

}


/**
 * Display admin page.
 */
function my_render_custom_admin_page() {

	if ( ! current_user_can( 'manage_options' ) ) {
		wp_die( 'You do not have permission to access this page.' );
	}


	$company_name  = get_option( 'my_company_name', '' );
	$support_email = get_option( 'my_support_email', '' );
	$footer_note   = get_option( 'my_footer_note', '' );

	?>

	<div class="wrap">

		<h1>My Settings</h1>


		<form method="post" action="options.php">

			<?php settings_fields( 'my_settings_group' ); ?>


			<table class="form-table">

				<tr>

					<th>
						<label for="my_company_name">
							Company Name
						</label>
					</th>

					<td>
						<input
							type="text"
							id="my_company_name"
							name="my_company_name"
							value="<?php echo esc_attr( $company_name ); ?>"
							class="regular-text"
						>
					</td>

				</tr>


				<tr>

					<th>
						<label for="my_support_email">
							Support Email
						</label>
					</th>

					<td>
						<input
							type="email"
							id="my_support_email"
							name="my_support_email"
							value="<?php echo esc_attr( $support_email ); ?>"
							class="regular-text"
						>
					</td>

				</tr>


				<tr>

					<th>
						<label for="my_footer_note">
							Footer Note
						</label>
					</th>

					<td>
						<textarea
							id="my_footer_note"
							name="my_footer_note"
							rows="5"
							class="large-text"
						><?php echo esc_textarea( $footer_note ); ?></textarea>
					</td>

				</tr>

			</table>


			<?php submit_button( 'Save Settings' ); ?>


		</form>

	</div>


	<?php

}
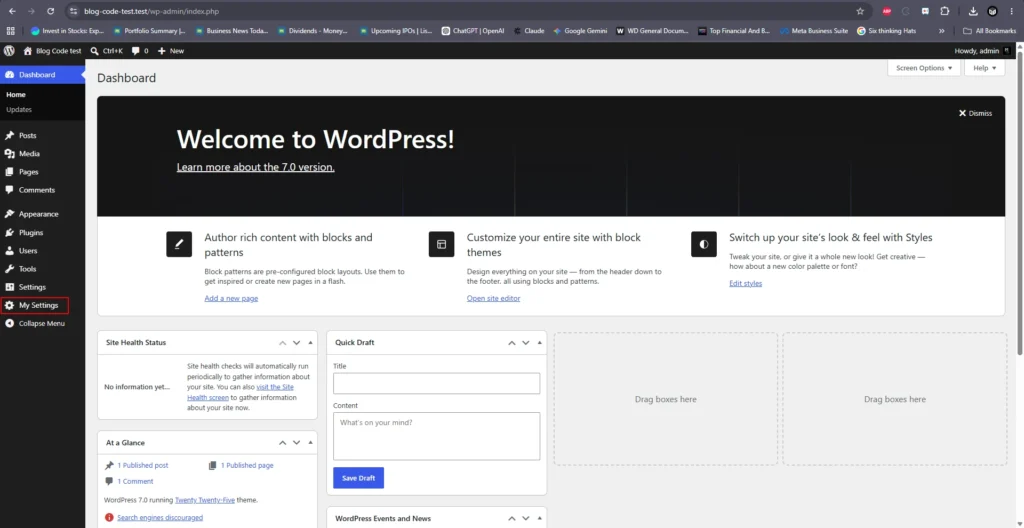
Activate the plugin from the WordPress Plugins screen.
You should now see a new My Settings menu item inside the WordPress admin sidebar.
Understanding the Important Parts
This function creates the new admin menu.
add_menu_page(
	'My Settings',
	'My Settings',
	'manage_options',
	'my-settings',
	'my_render_custom_admin_page',
	'dashicons-admin-generic',
	80
);
The permission value is very important.
manage_options
This means only users with administrator-level permissions can access this page.
I also like checking permissions again inside the page function.
if ( ! current_user_can( 'manage_options' ) ) {
	wp_die( 'You do not have permission to access this page.' );
}
Never depend only on hiding menu items.
Always protect the actual functionality.
Saving Data the WordPress Way
For simple settings pages, I prefer using the WordPress Settings API.
Instead of manually processing form submissions, WordPress handles saving through:
settings_fields()
and
register_setting()
Each field also gets its own sanitization rule.
Example:
register_setting(
	'my_settings_group',
	'my_company_name',
	array(
		'sanitize_callback' => 'sanitize_text_field',
	)
);
This keeps the plugin safer and easier to maintain.
Sanitizing and Escaping Data
This is an area many developers overlook.
Saving data and displaying data are two different steps.
When saving:
sanitize_text_field()
When displaying inside an input:
esc_attr()
Inside textarea fields:
esc_textarea()
Inside HTML:
esc_html()
A custom admin page is still a form.
Treat every input properly.
Adding the Page Under Settings Instead
Not every custom page needs a separate sidebar menu.
For small plugin settings, I usually prefer adding it under:
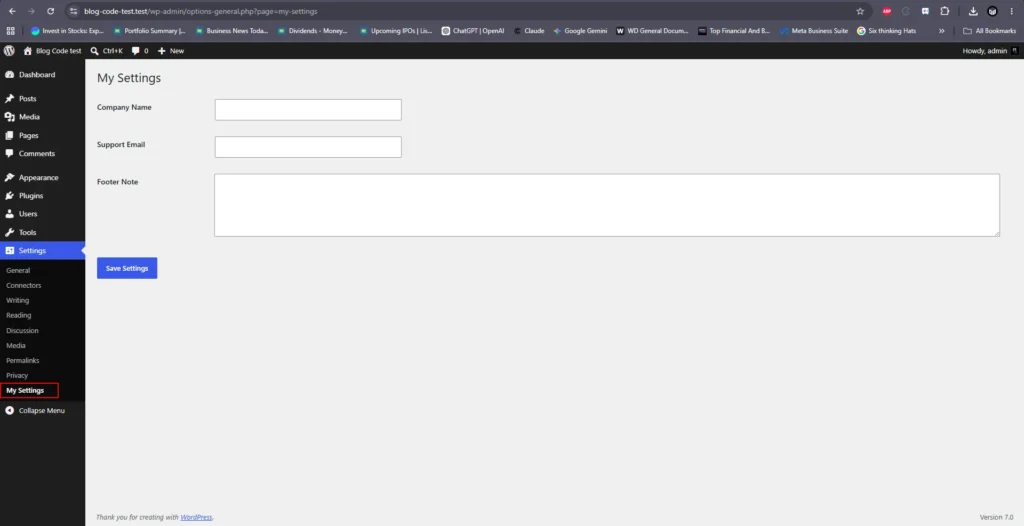
Settings → My Settings
For that, use add_options_page(). Replace this chunk of code:
add_action( 'admin_menu', 'my_register_custom_admin_page' );

function my_register_custom_admin_page() {

	add_menu_page(
		'My Settings',
		'My Settings',
		'manage_options',
		'my-settings',
		'my_render_custom_admin_page',
		'dashicons-admin-generic',
		80
	);

}
with this:
add_action( 'admin_menu', 'my_register_options_page' );

function my_register_options_page() {

	add_options_page(
		'My Settings',
		'My Settings',
		'manage_options',
		'my-settings',
		'my_render_custom_admin_page'
	);

}
This keeps the WordPress dashboard cleaner.
When Should You Build a Custom Admin Page?
Custom admin pages are useful for:
Plugin settings, API configuration, Export tools, Reports, Import tools, Client dashboards, Internal management tools
But I do not create custom admin pages for everything.
If the client is managing regular content, a custom post type is usually a better option.
Before creating an admin page, I usually ask:
“Am I creating content management or a tool?”
If it is content, use WordPress content features.
If it is a tool, build an admin page.
Real Project Usage
In real projects, small custom admin pages can save a lot of time.
For example, a client may need to manage API keys, export records, or control small settings used across the website.
Instead of asking them to edit files or touch code, a simple admin page gives them a safe interface.
The goal is not to add hundreds of options.
The goal is to give exactly the control they need.
Best Practices
Keep admin pages simple.
Use a custom plugin.
Use proper WordPress capabilities.
Sanitize everything before saving.
Escape everything before displaying.
Avoid unnecessary top-level menus.
Keep client-facing labels simple.
Load CSS and JavaScript only on your admin page.
A good admin page should feel like it belongs inside WordPress.
Common Mistakes
The first mistake is putting every custom feature into functions.php.
It works initially, but it becomes difficult to maintain.
Another mistake is skipping security because “only admins use this page”.
Admin pages still process data.
They should always be coded properly.
Also avoid creating complicated dashboards when WordPress already has existing solutions like custom post types or settings pages.
Simple solutions usually last longer.
Final Thoughts
Building custom admin pages in WordPress is a skill that becomes more valuable as projects become more advanced.
Small tools created specifically for a project can improve the client experience a lot.
But build them the WordPress way.
Use plugins.
Use permissions.
Sanitize input.
Escape output.
Keep things simple.
In my experience, the best admin pages are not the most complicated ones.
They are the ones that solve one problem really well.
FAQs
A custom admin page is a new page added inside the WordPress dashboard for handling project-specific functionality. Developers commonly use custom admin pages for plugin settings, reports, import/export tools, API settings, and client-specific controls.
I usually avoid adding custom admin pages inside functions.php. A small custom plugin is a better approach because the functionality remains available even if the WordPress theme is changed in the future.
The add_menu_page() function creates a new top-level menu item in the WordPress dashboard. The add_submenu_page() function adds a page under an existing menu. For small settings pages, adding a submenu is usually a cleaner option.
Yes. Custom admin pages should always include proper capability checks, data sanitization, and output escaping. Even if only administrators can access the page, following WordPress security practices keeps the code safer and easier to maintain.
Yes. Page builders like Bricks Builder and Elementor mainly control the front-end design. Custom admin pages work separately inside the WordPress dashboard and are useful for storing settings, managing data, or creating custom project tools.
If the client needs to manage repeated content like team members, products, projects, or testimonials, a custom post type is usually better. Custom admin pages are better suited for tools, settings, reports, and custom workflows.